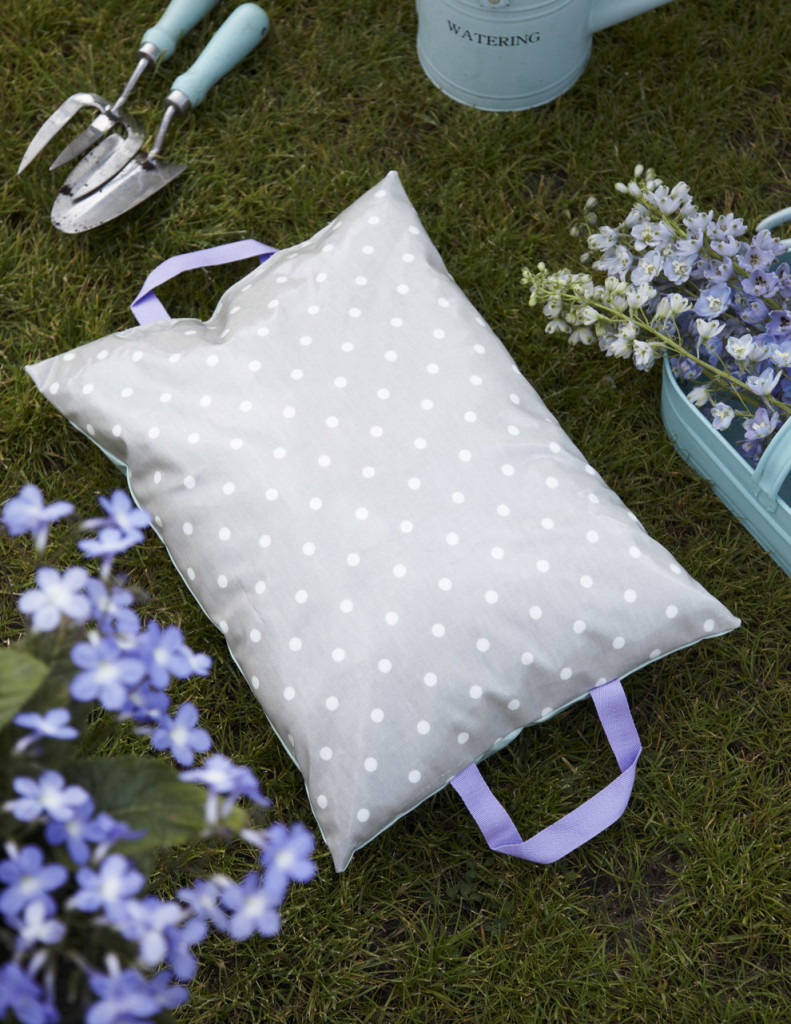
Take a knee on this fancy garden kneeler with the help of author and blogger Torie Jayne.
Just in time for spring, Torie gives us a sneak peek at this project and excerpt from her new book Torie Jayne’s Stylish Home Sewing.
Take the weight off your knees with this fully padded pretty garden kneeler or sit on it for a welcome garden break. Made out of wipe-clean oilcloth and with two sturdy handles, it is a lovely practical addition to your garden tools. When not in use, it also adds a lovely pop of print and color to your garden shed!
You will need:
Two 12 in (31 cm) lengths of 1 in (25 mm) wide twill tape
One 16 x 21 in (40 x 54 cm) rectangle each of two oilcloth fabrics (like a charming Laura Ashley PVC Fabric)
Matching sewing thread
9 oz (250 g) of 100 percent polyester high-loft fiberfill toy filling
- Pin one length of twill tape to the right side of one oilcloth rectangle, as shown, so that the ends of the tape are even with one short edge of the oilcloth and are equal distances from the long edges. Make sure that the pins are no more than 3/8 in (1 cm) from the edge. Repeat to pin the other length of tape to the other short edge of the same piece. Stitch each handle in place 3/8 in (1 cm) from the edge.
- Place the other oilcloth rectangle on top of the first one, with right sides together, sandwiching the handles between the two layers. Paperclip in place around the edges, rather than pinning.
- Using a Teflon foot on your machine (see Tips), and starting and finishing at one of the shorter sides, stitch a 3/8 in (1 cm) seam, pivoting the fabric at the corners and leaving an opening between the starting and finishing points. Snip off the corners of the seam allowances.
- Turn the kneeler right side out through the opening. Using a blunt-ended tool, such as the rounded end of a chopstick, carefully push out the corners. Take a generous handful of filling and gently pull it to loosen it, repeating the process two or three times. Insert it into the cover, starting in one of the corners farthest from the opening. Gently, but firmly, push the filling into the corner. Repeat with the other corner farthest from the opening, then fill the remaining two corners. Insert small amounts of additional filling, gradually working toward the opening, until it is firm and plump. Fold in the seam allowances of the opening, and paperclip the opening closed, then stitch it using a Teflon foot.
TIPS SEWING ON OILCLOTH
The hardest part of sewing oilcloth is that the foot grips the oilcloth and can stop you from sewing evenly. A Teflon foot on the sewing machine offsets this. Keeping your stitches large also helps.
Avoid using pins on areas that will be visible, as they leave lasting holes—use paperclips instead.
Love this project? You’ll surely covet a copy of Torie’s new book published by CICO Books. For more information on Tori Jayne’s Stylish Home Sewing, click here.
Torie Jayne studied fashion at Kingston University, and then got her first job in New York and later returned to London where she worked for many high-street brands. In 2009 she started her blog, toriejayne.com, to share her passion for crafts and interiors.
Author Photo: Copyright (c) Quintet Publishing, taken from Craft, Show & Sell by Torie Jayne (2014)
Project Photography by Sussie Bell, Illustrations by Kate Simunek


