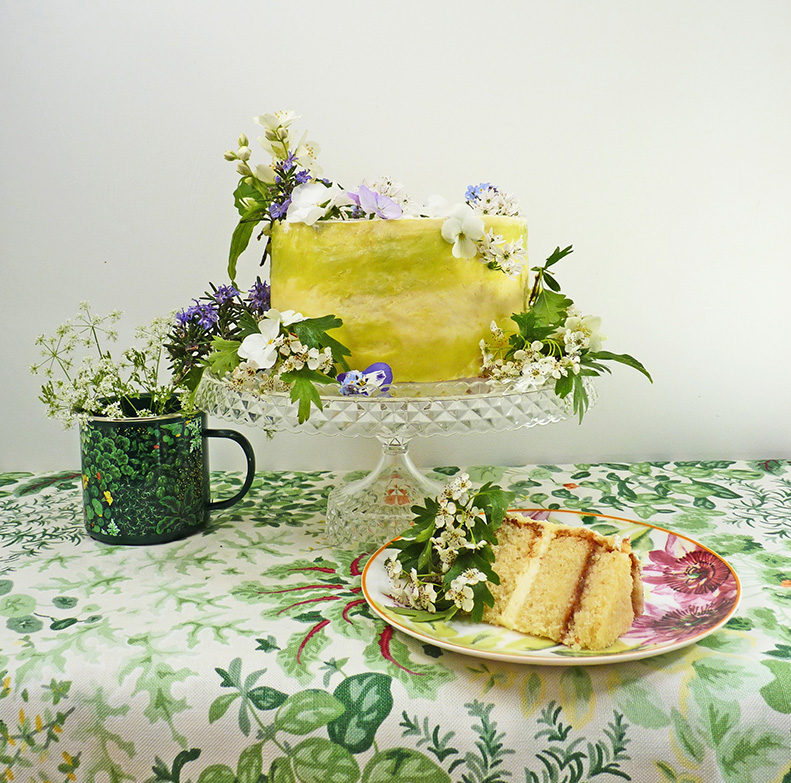
We are so excited to have cake artist Natasha Collins create a one of a kind confectionary creation based on our Spring/Summer collections. Natasha is the owner of Nevie-Pie Cakes, based in Hertfordshire, England. She has been at the forefront of the painted cake trend, with two award winning books to her name- ‘The Painted Cake’ and ‘The Homemade Wedding Cake.’ Her high profile clients include Selfridges and the BBC, and her work has appeared in Conde Nast Brides, Wedding Cakes and Flowers Magazine, Perfect Weddings, and Time Out. Here she takes inspiration from our Garden Room and Floral Heritage designs to transform a basic cake into two stunning displays of edible art.
I really love this time of the year when flowers seem to overflow along the lanes and fields. Hedges and trees explode with blossoms like fireworks, and birds are busy darting in and out of the greenery readying their nests. I am fortunate to live in a beautiful part of the country and I can walk out of my back gate into beautiful fields. As Spring comes to an end, the hawthorns which have been bedecked in blossom begin to lose their flowers, but another hedgerow star starts to shine, the Elderflower. Often I don’t even need to see the trees to know that they are in bloom as I can smell the heady perfumed scent drifting across the fields. The flowers make a really delightful cordial and I try to make a batch every year – it doesn’t last long as it really is the perfect refreshing drink. Fortunately, most supermarkets stock elderflower cordial all year round now, so you don’t have to wait to make this delicious cake, which marries elderflower and gooseberries, a match made in heaven (or the hedgerows).
CAKE RECIPE:
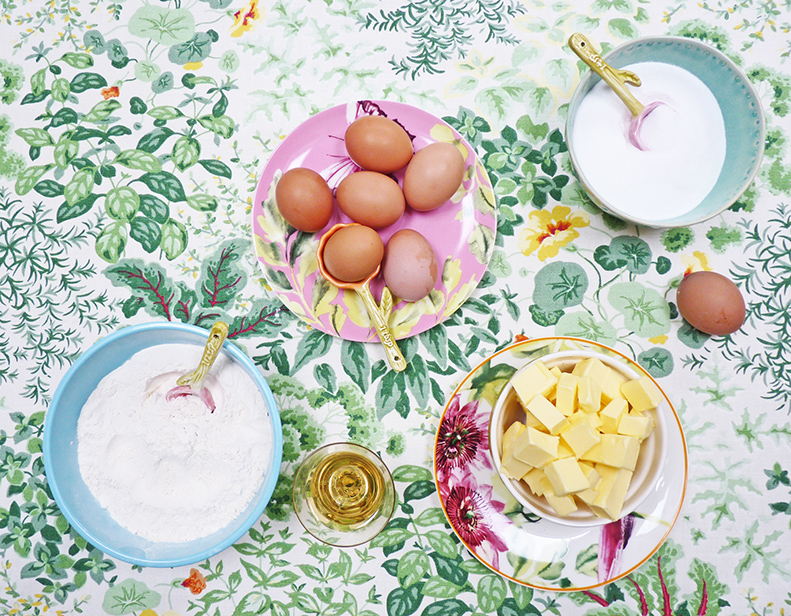
Cake Ingredients:
- 350 g unsalted butter at room temperature
- 350 g superfine sugar
- 5 tablespoons of elderflower cordial
- 7 large eggs
- 350 g of self-rising flour
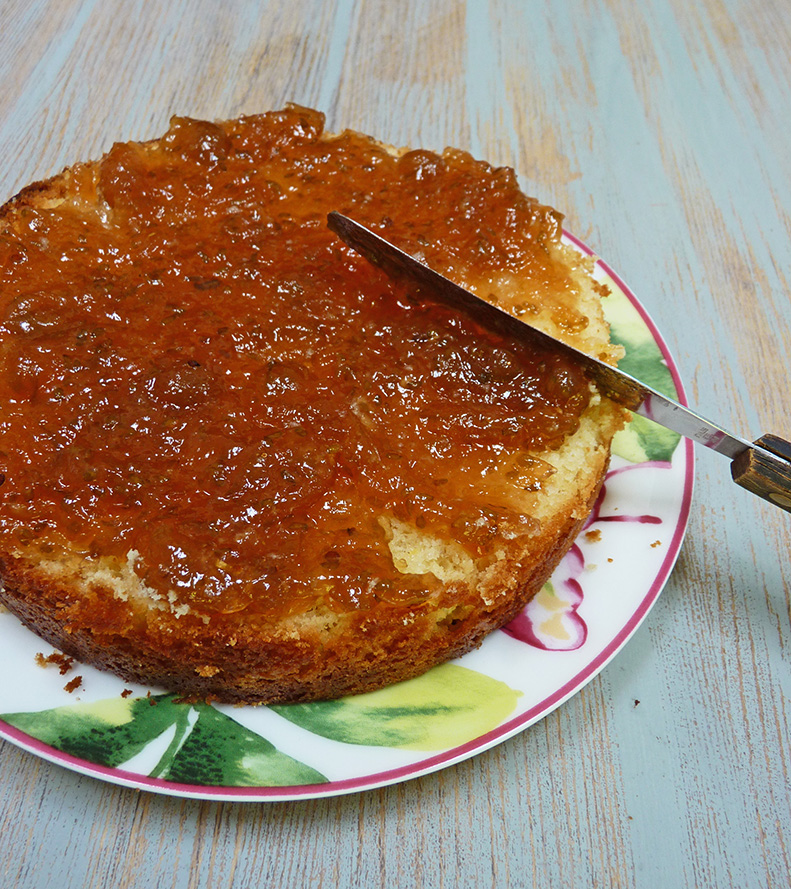
- 4 dessert spoons of gooseberry jam (if you can’t find gooseberry jam, then elderflower pairs really well with lemon, so use lemon curd)
Method:
Preheat the oven to 200 C (400 F) (180 C Fan).
Grease and line three 7” cake tins (if you only own one tin then you can bake all the mixture in it but you will need to double the cooking time at the very minimum).
Beat the butter and sugar together until they are creamed (the mixture will lighten in colour).
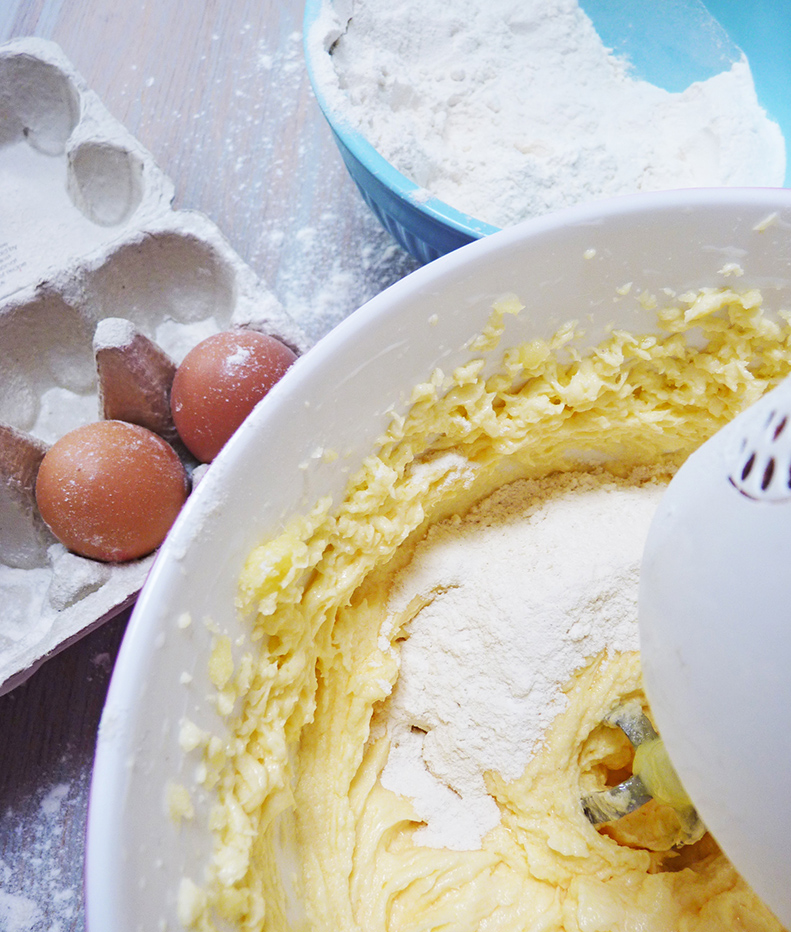 Add the eggs in one by one (if the mixture curdles, add a tablespoon of flour).
Sift the flour into the bowl and fold it into the mixture.
Fold in the elderflower cordial.
Divide the mixture into the three tins and bake for 30-35 minutes. The cakes are ready when a skewer inserted onto the center of the cake comes out clean. Leave the cakes to cool in the tins for 10 mins, then turn out onto a wire rack to cool completely.

TOPPING RECIPE:
Buttercream ingredients:
- 4 egg whites (use pasteurised)
- 460 g superfine sugar
- 675 g unsalted butter at room temperature cut into small cubes
- 5 tablespoons elderflower cordial
- Green food colour (optional)
Method:
Fill a saucepan one-third full of water and bring it to boil, then reduce to simmer.
Set a heatproof bowl in the top of the saucepan making sure that the bottom of the bowl doesn’t touch the water.
Put the egg whites and sugar into the bowl. Stir the mixture until the sugar has dissolved and the mixture is hot (not warm). If you are using unpasteurized eggs, you need to heat the mixture to 144 F (make sure to keep stirring so that the egg whites don’t set).
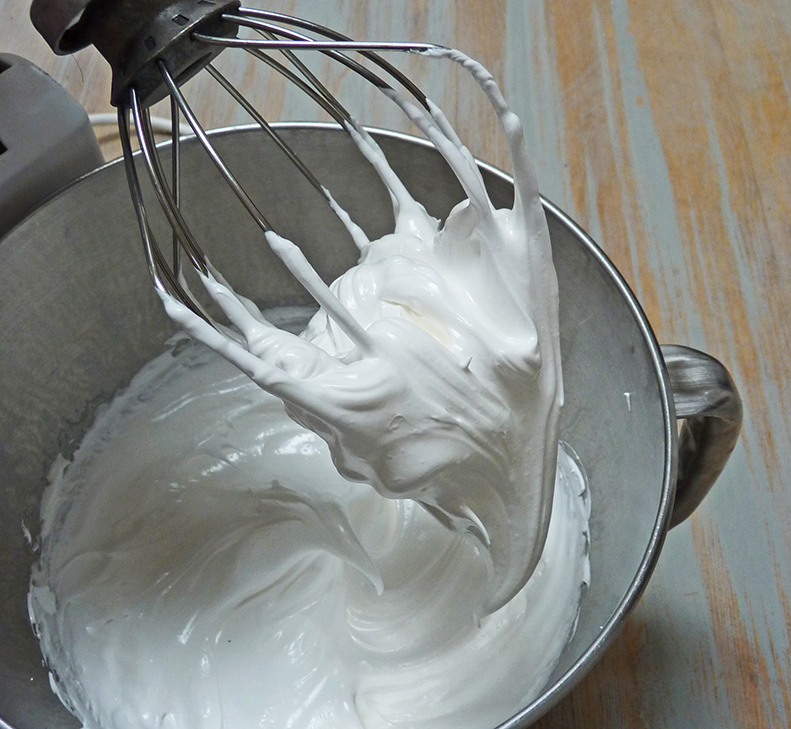
Remove the bowl from the saucepan and transfer the mixture to the bowl of a standing electric mixer (if you are whisking this with a hand whisk, you may need to transfer the mixture to a larger bowl).
Using the highest setting, beat the egg whites until stiff and glossy – this may take around ten minutes.
Add the butter, a small piece at a time, and beat in well. Don’t worry if at any point the mixture starts to look curdled, keep beating and the butter will incorporate. Once all the butter has been added, beat for a few more minutes.
Beat in the elderflower cordial.
Take out 75 g of the buttercream and colour it with the green food colour.

Method for layering and filling the cake:
Trim all the cake layers with a serrated knife so that they are all the same depth and flat topped.
Cover the bottom layer with the gooseberry jam.
Place the next layer on top and cover this with buttercream.
Add the last cake layer on top of the buttercream.
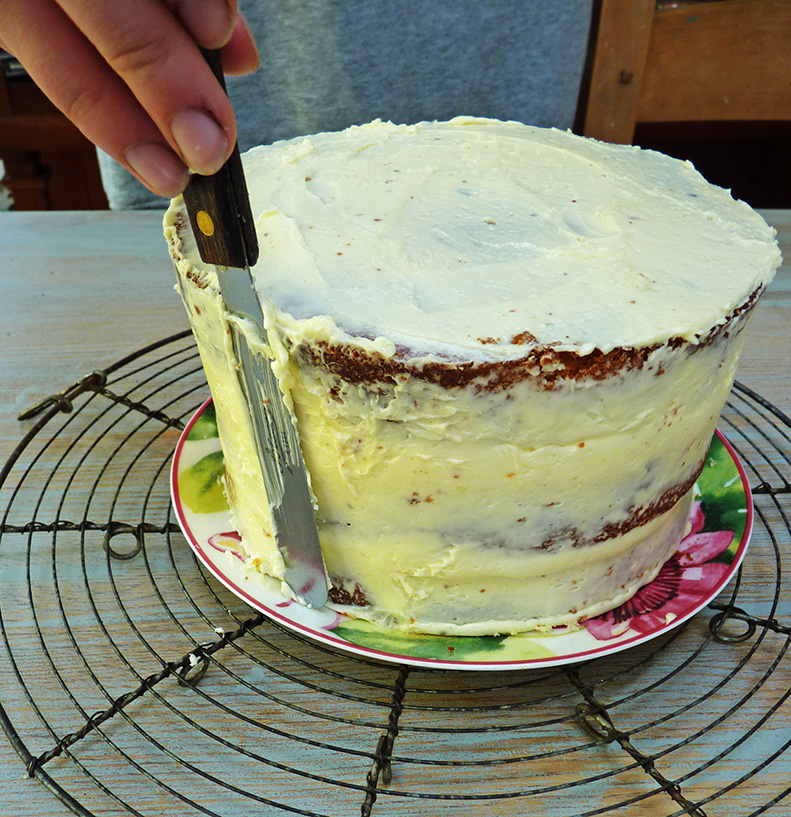
With a palette knife spread a thin layer of buttercream around the top and edges of the cake. This is called a crumb coat. Place the cake in a refrigerator for around 30 minutes until this crumb coat has hardened.
Method for decorating with buttercream:
Add a thicker layer of buttercream around the top and sides of the cake and with the palette knife, smooth the buttercream down.
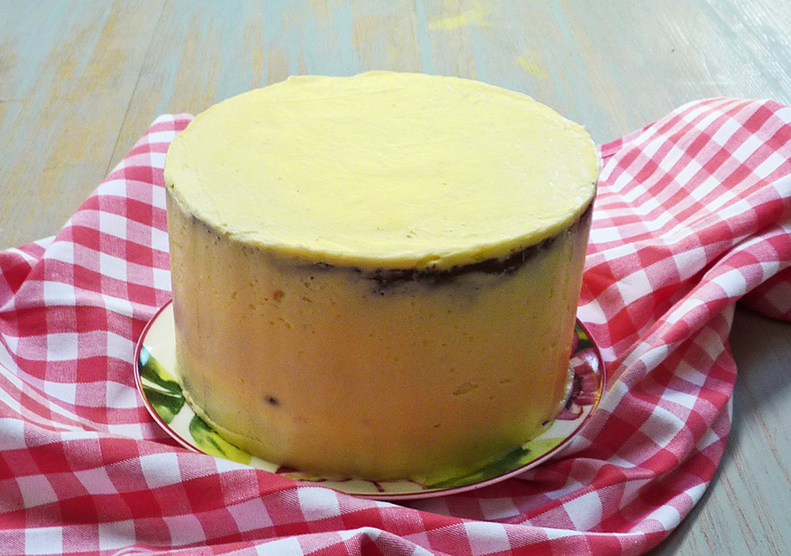
Spread the green buttercream around the top and bottom edges of the side of the cake.
Smooth it down to blend with the cream buttercream and create a watercolour effect.
Place the cake back in the fridge to chill for 30 mins.
Decorate the cake with edible or non-poisonous flowers. You will find that the flowers may wilt fairly quickly, especially if it is a warm day.
Instead of a buttercream frosting, the second option is to paint the cake once it’s out of the oven.
Method for painting the cake:
Equipment:
- 750 g white fondant (or sugarpaste)
- Cornflour
- Large rolling pin
- Sharp knife
- Smoothers (optional)
- 75 g of modeling paste
- Synthetic round-end brushes, sizes 0, 4
- Kitchen paper
- Artist palette
- Cooled boiled water
- Edible glue
- A brush for gluing
- A scalpel
- A foam mat
- Small rolling pin (optional)
- Toothpick or lollipop stick
- Tracing paper
- The templates
A non-toxic pencil
Colours (Yellow, Dark brown, Blue, Green, Red, Burgundy)
You need specialist food pastes to paint with, however not all pastes are suitable, the best ones that I can recommend are Natasha Collins Edible Paints with Squires Kitchen, Sugarflair, or Wilton.
Method for covering the cake with fondant:
Sprinkle the work surface with cornflour.
Roll the fondant out to a depth of 4 mm – 5 mm. Smooth the surface with the smoother if you have one; if not, use the palm of your hand.
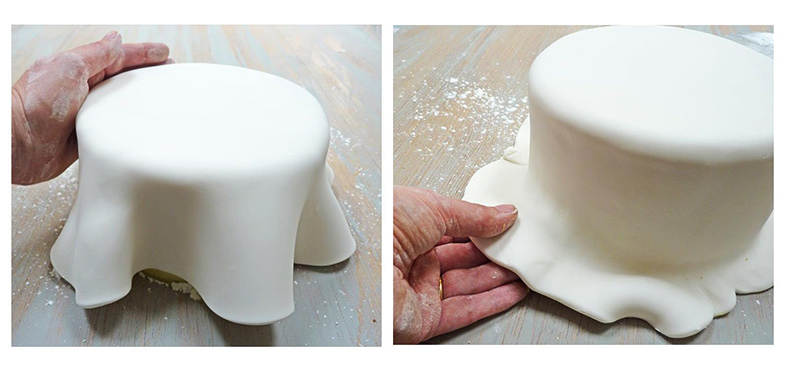
Take the cake out of the fridge and cover it with the fondant.
Pull the skirt of the fondant tight to get rid of any folds and pleats and smooth down the sides of the cake.
Trim the edge with a sharp knife.
Painting the cake:
General painting tips:
After covering with the fondant, leave the cake for at least six hours so that the fondant hardens a little.
Mix the paints with water; vary the amount of water used to achieve different tones. Where I specify a dark tone, use a very small amount of water; for a light tone, use more water.
Leave each layer of colour to dry before you continue painting the next layer.
Use the size t0 brush only for the smallest elements such as the outline.
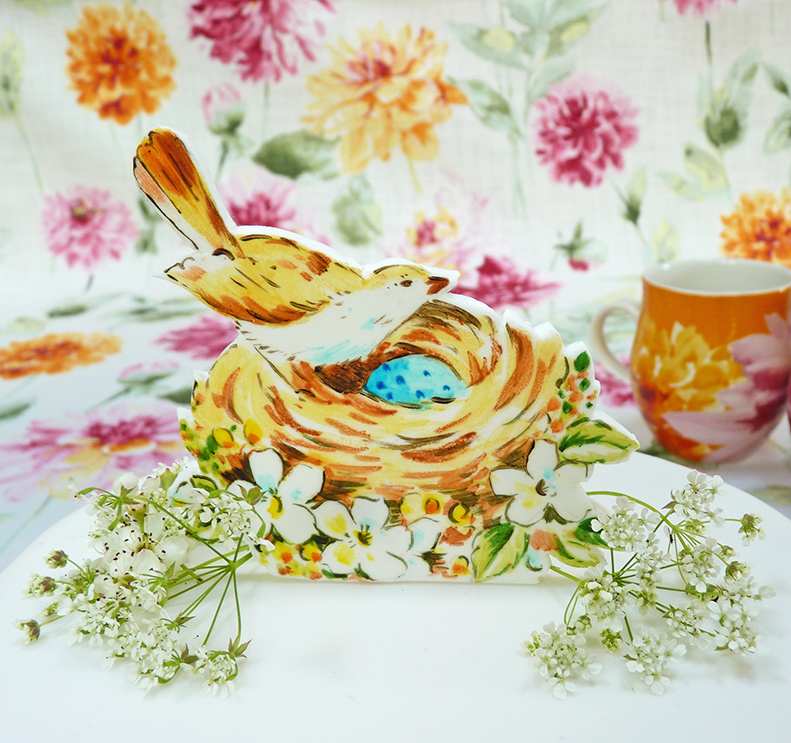
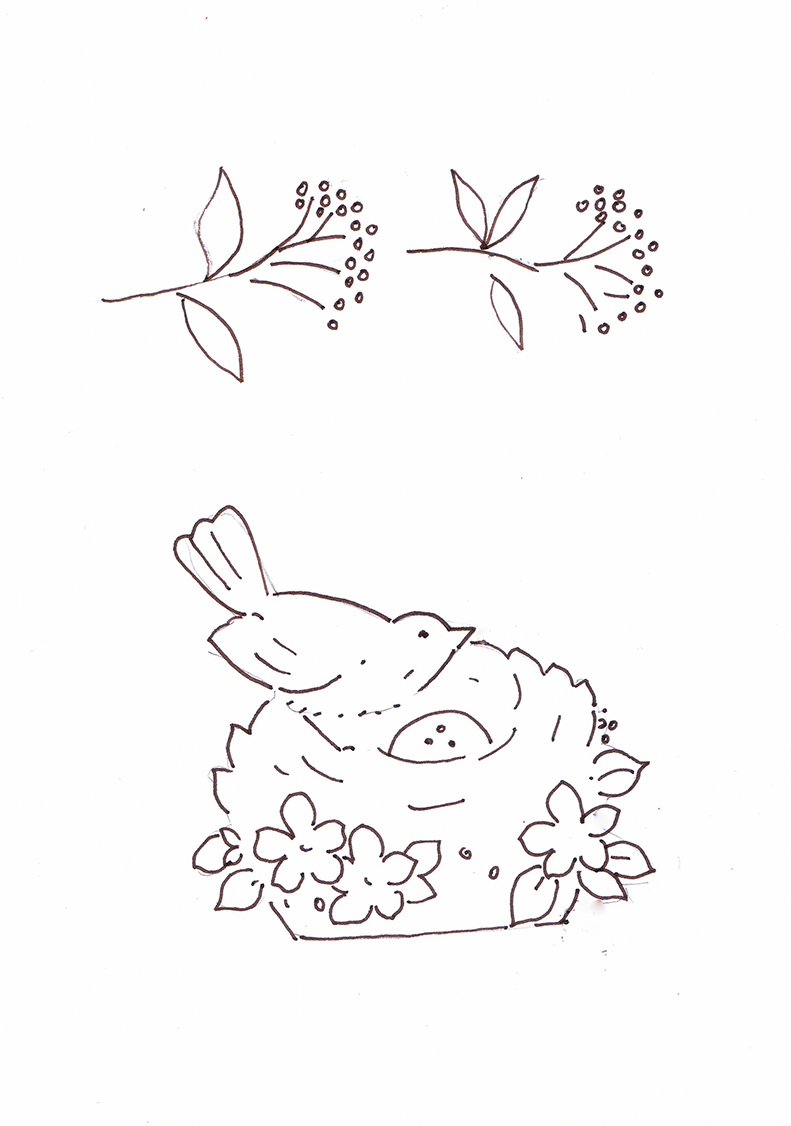
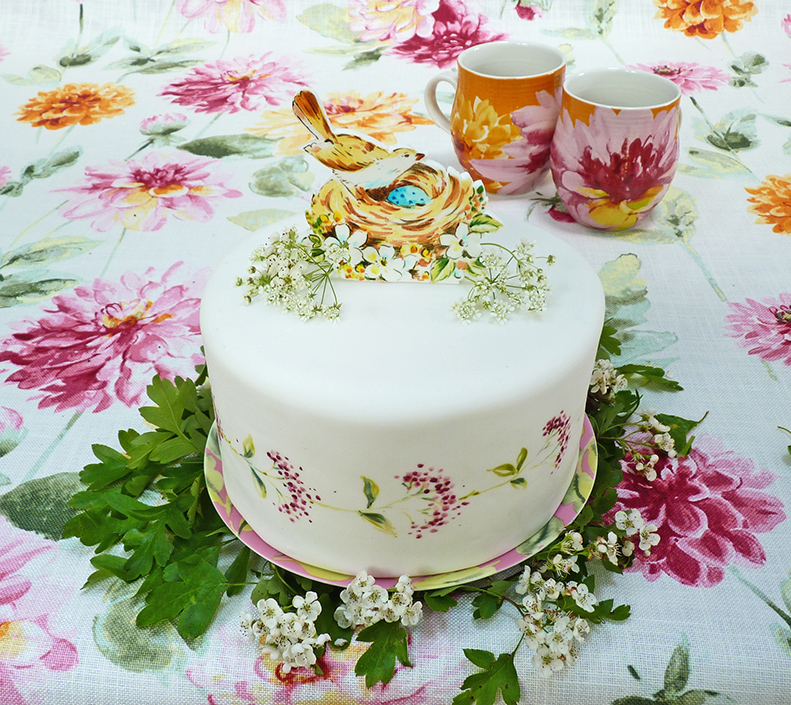
Painting the bird topper:
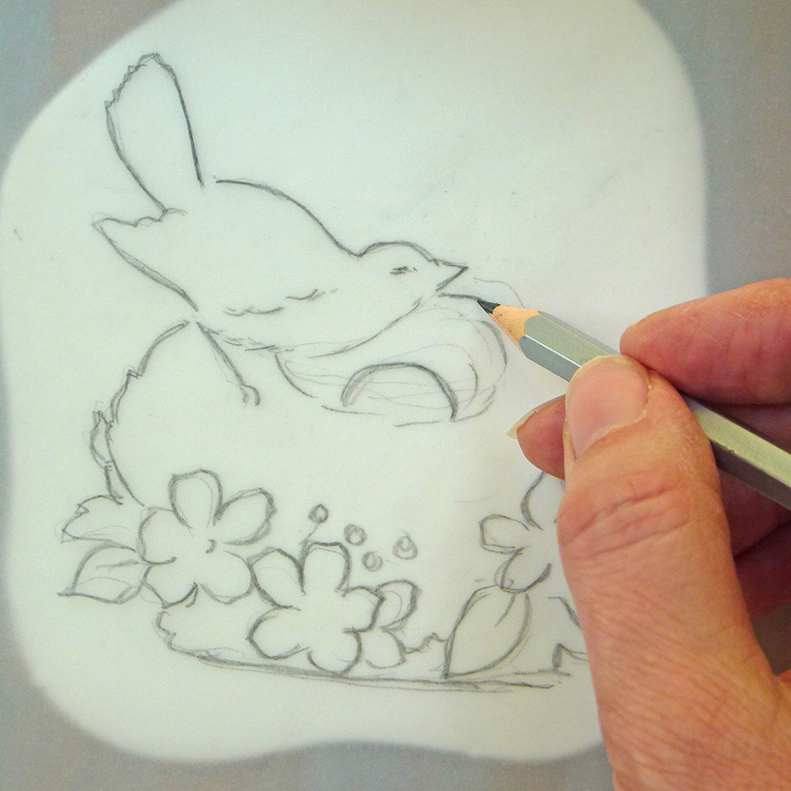
Trace the bird template onto the tracing paper.
Turn the paper over and trace over the pencil lines.
Turn the tracing paper the right way.
Sprinkle the surface with cornflour and roll out the modelling paste to a thickness of 3 mm – 4 mm.
Place the tracing paper on the modelling paste and lightly trace over the template.
Cut around the shape with the scalpel.
Mix together some yellow and brown – add enough water to create a medium tone.
Use the size 4 brush to paint the back and tail of the bird and the nest.
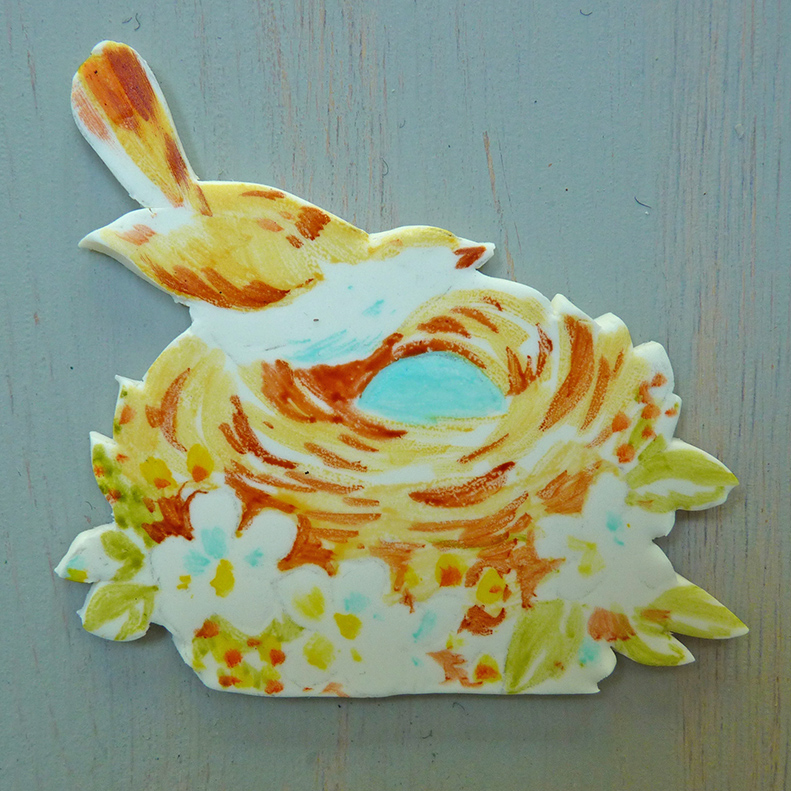
Mix up a medium green tone and paint in the leaves.
Mix up a light blue tone and paint the bird egg and some detail on the flowers and the bird’s breast.
Paint in the yellow centers of the flowers.
Add some red details onto the bird’s tail and some red berries.
Mix together some red and brown and add some details onto the bird and the nest.
Add some dark blue dots to the bird egg.
Mix together some green and blue and use this tone to add shading detail to the leaves.
Use the size 0 brush to paint the outline on the plaque with the dark brown.
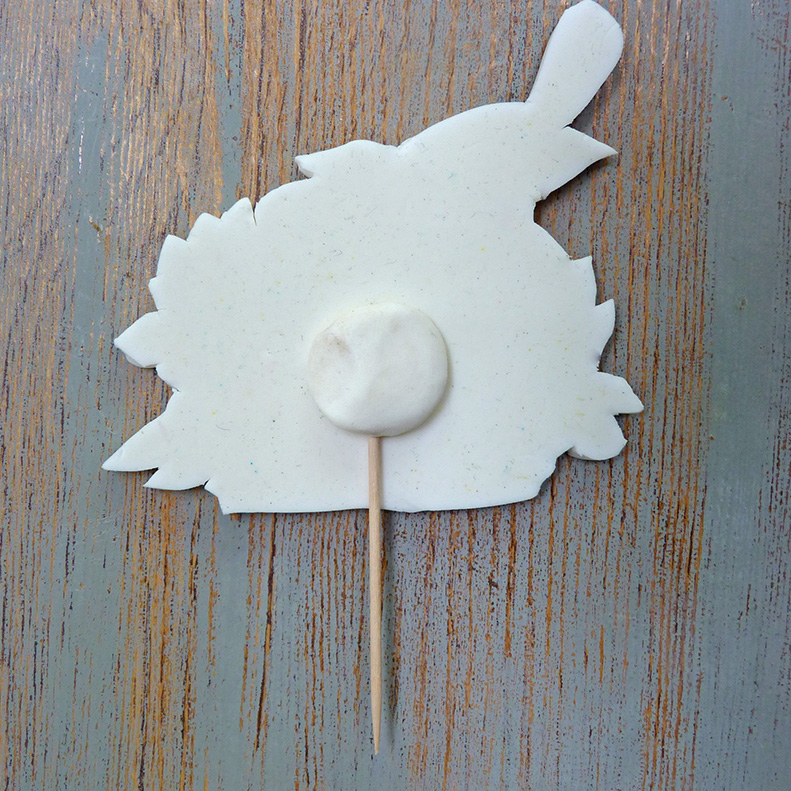
Leave the plaque on the foam pad overnight to harden.
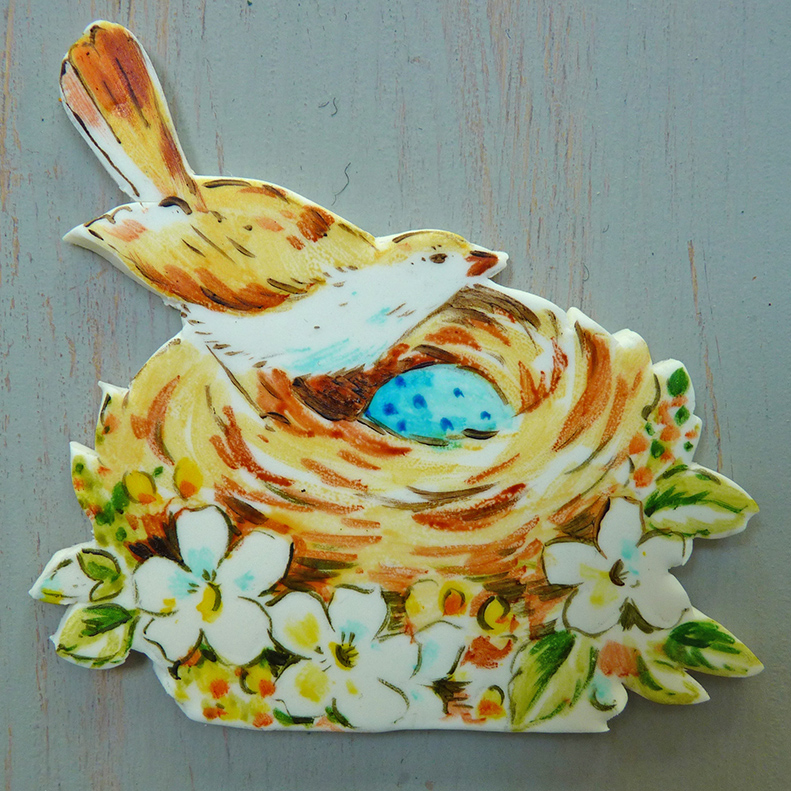
Place the toothpick on the back of the plaque and with the edible glue stick it in place with a couple of balls of modelling paste. Leave for a couple of hours to dry before you place it on to the cake.
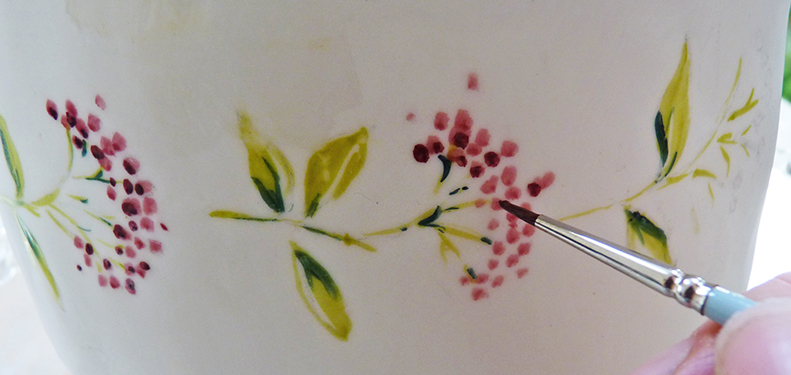
Painting the elderberry ribbon:
If you don’t want to paint free hand, trace the pattern onto the cake. Be careful not to press too hard or you will make a dent.

Mix up a medium tone of green and with the size 0 brush paint the stalks, use the size 4 brush to paint the leaves.
Use a medium tone of burgundy to paint the berries.
Mix together the green and blue and paint in some shading on the stalks and leaves.
Add some dark burgundy to the berries.
Once dried, place the bird topper onto the cake and decorate with fresh flowers. And of course, the best part – slice and enjoy with friends!
Thank you Natasha for creating such a beautiful cake, it looks too pretty to eat! Let us know your thoughts below or on Twitter.