
Looking for a no-fail way to create a beautiful centerpiece? Look no further than your favourite textile.
Written and photographed by Jickie Torres
Editor, Cottages & Bungalows
Whether it’s for a special gift, a special occasion or just a little indulgence for you, creating a beautiful flower arrangement is a lovely skill. And if you think you need a florist’s training to put together a professional-looking arrangement, think again. Over the past 12 years as editor of Cottages & Bungalows and styling for several other magazines before then, I’ve learned a few tricks of the trade while working on the job. The more you work with flowers, the more you develop a sense for how to mix, match and compose them. But I’ve got a trick for you that works every time: don’t start at the flower shop, start with your favorite piece of fabric. Here’s how to arrange flowers inspired by your favorite textile.
It’s Something All Designers Do
Having interviewed designers and homeowners about the process of creating beautiful rooms I can tell you most come together from a single inspiration piece and most often it’s a textile. It makes sense: textile designers pour all their energy into creating patterns where colors and motifs are executed in the perfect combinations and scales. Just look at any Laura Ashley product or pattern and you can see how pulling similar colors and using them to choose the flowers for your arrangement will result in a perfect combination almost anyway you try it. So let’s try it, shall we?
The Inspiration Piece
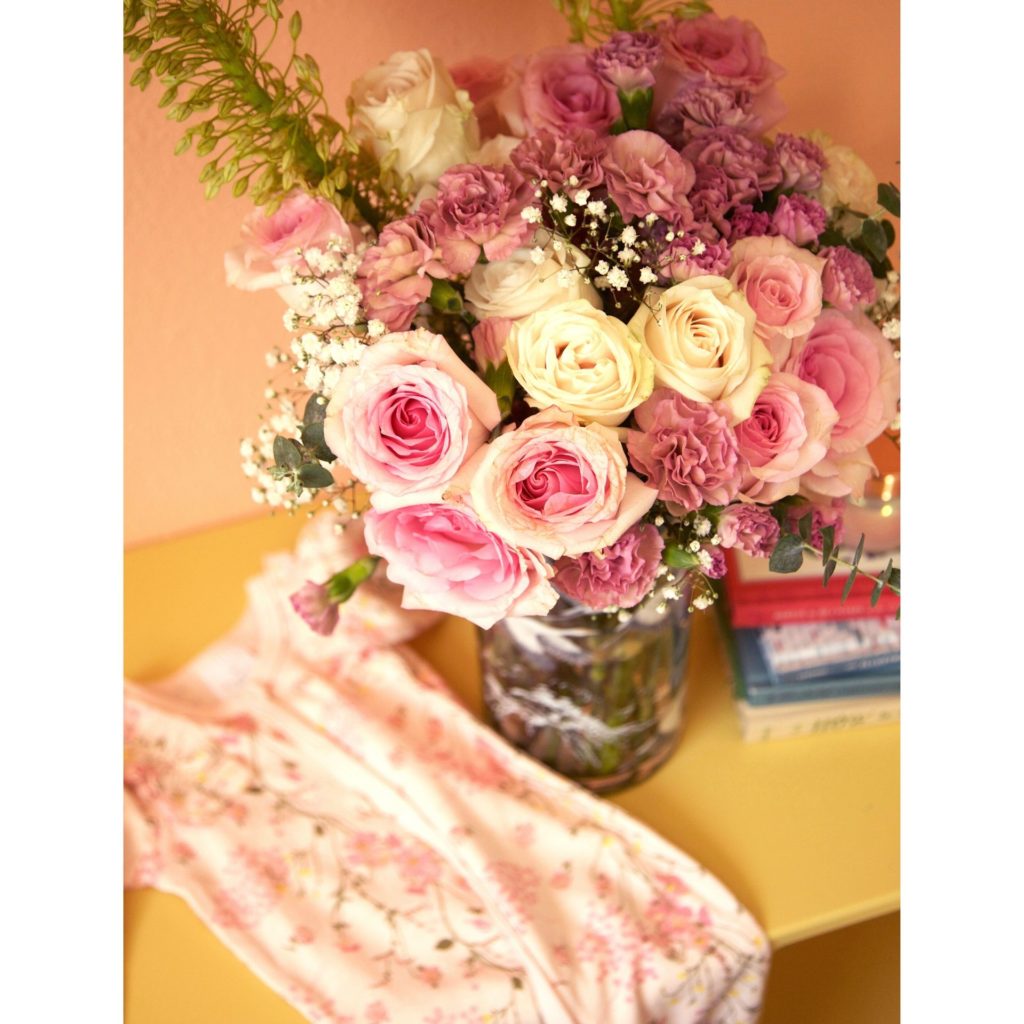
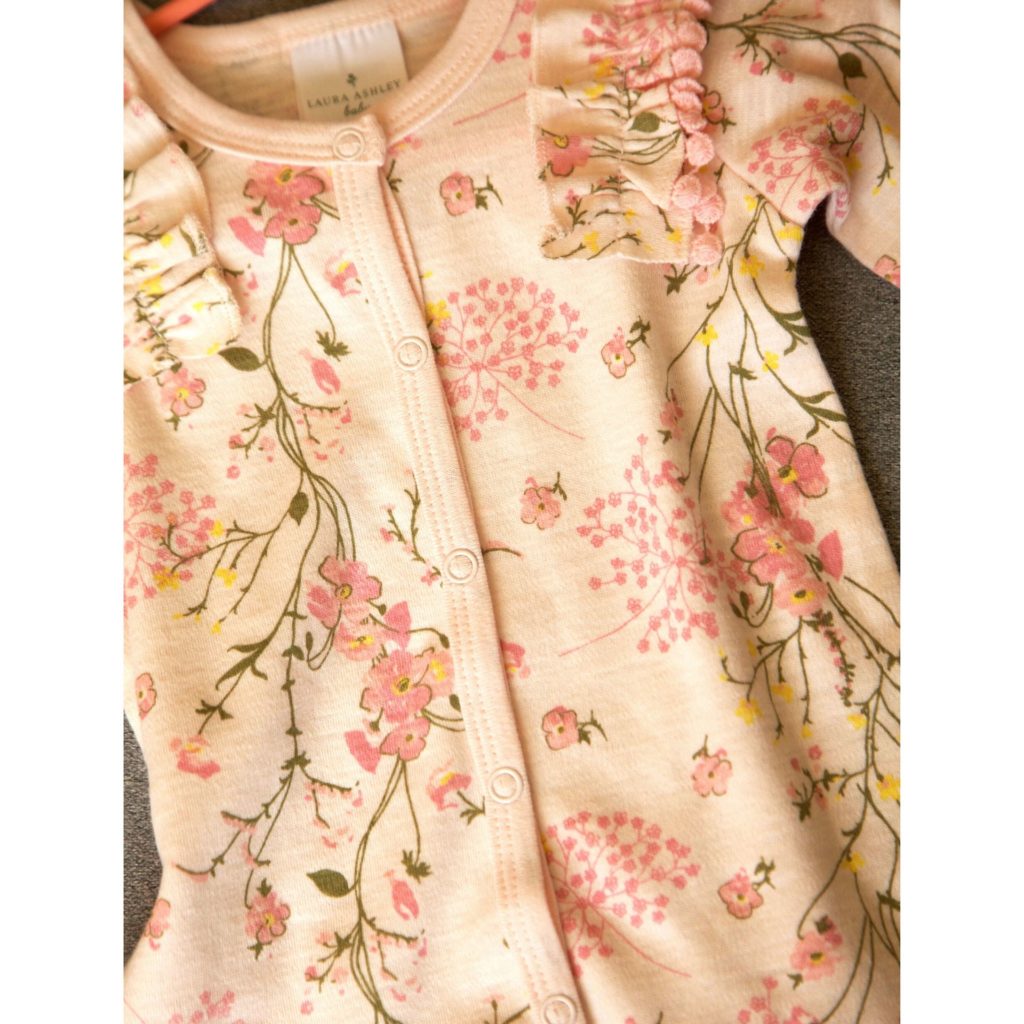
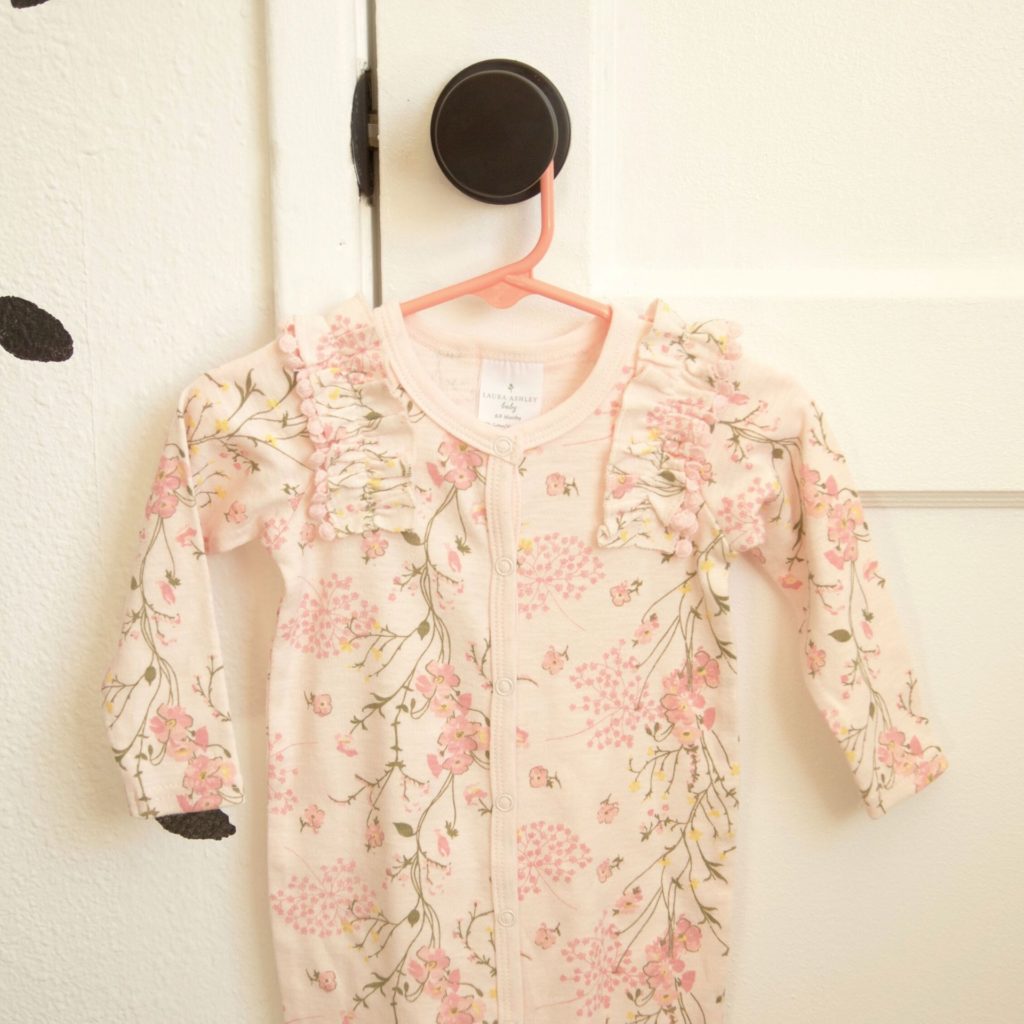
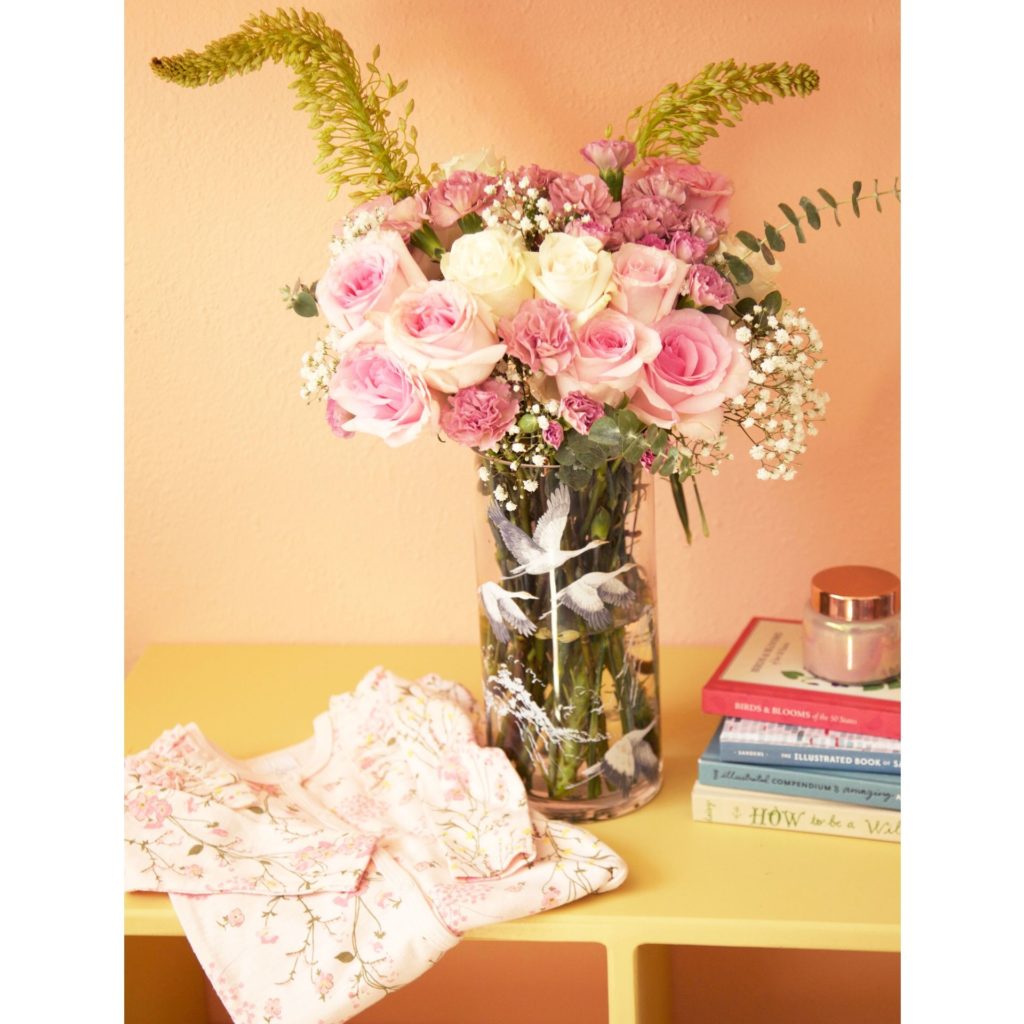
I’m expecting my first bundle of joy at the end of summer so my current fave is this darling pajama set from Laura Ashley’s infant line. I love the soft blush background combined with pops of deep pink and trails of lovely greens. So I head to my local Trader Joes—that’s right! We’re going to make this arrangement with store-bought flowers! No special trips to the flower market needed. Here’s what I picked up:
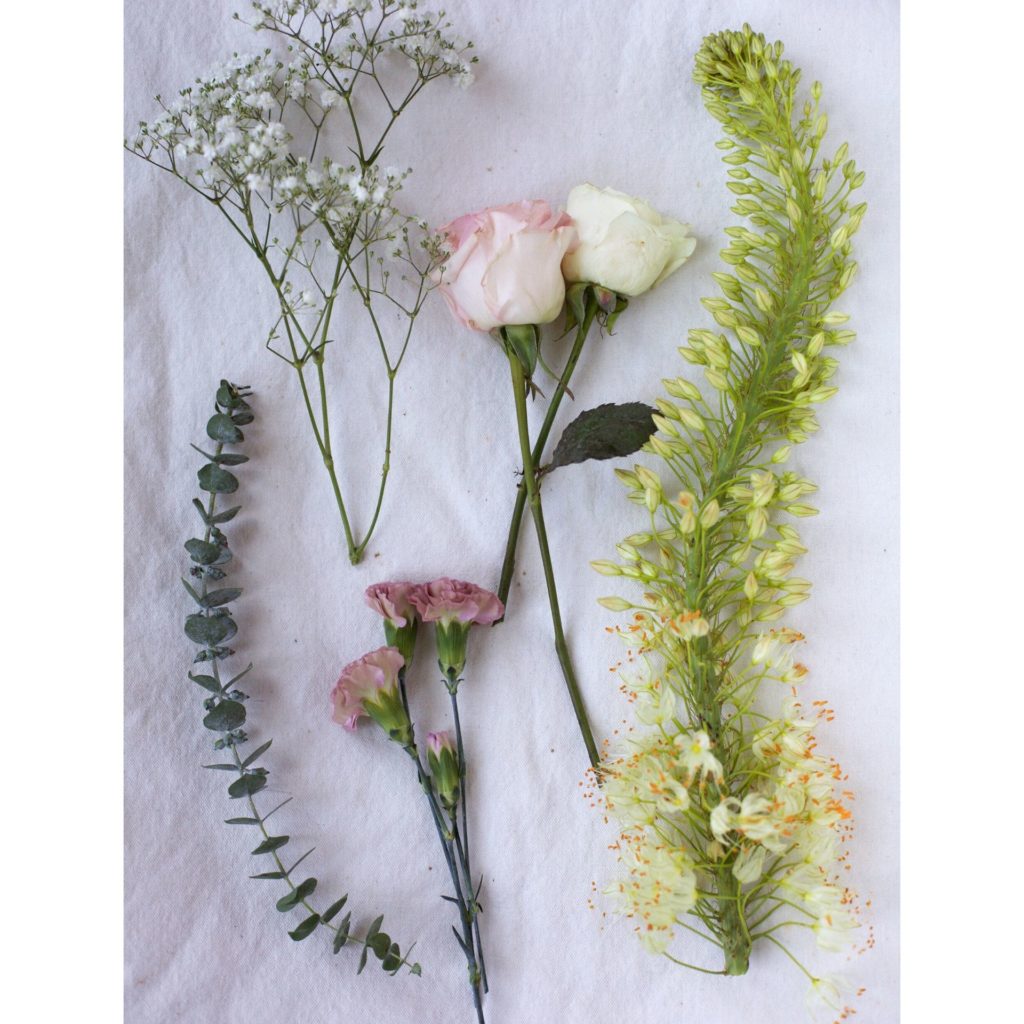
Caption: Hopefully you have a grocer with a well-stocked floral department. Trader Joe’s and Whole Foods seem to do the trick for me. If not, maybe a pit stop at a second market might help. My picks from left to right: eucalyptus, baby’s breath, dusty mauve carnations, pink and white roses and this spectacular foxtail lily
Step 1: Prep Your Flowers
Put flowers in water as soon as you get home, cutting the ends in a quick chop to expose fresh stem which will help the flowers stay hydrated. Then prep each stem you’ll be using by stripping the stems of all the leaves below your anticipated water line. This will not only help your arrangement look tidier (especially if you’re using a glass vase like I will be), it will prevent the water from getting murky, smelly and bacteria filled.
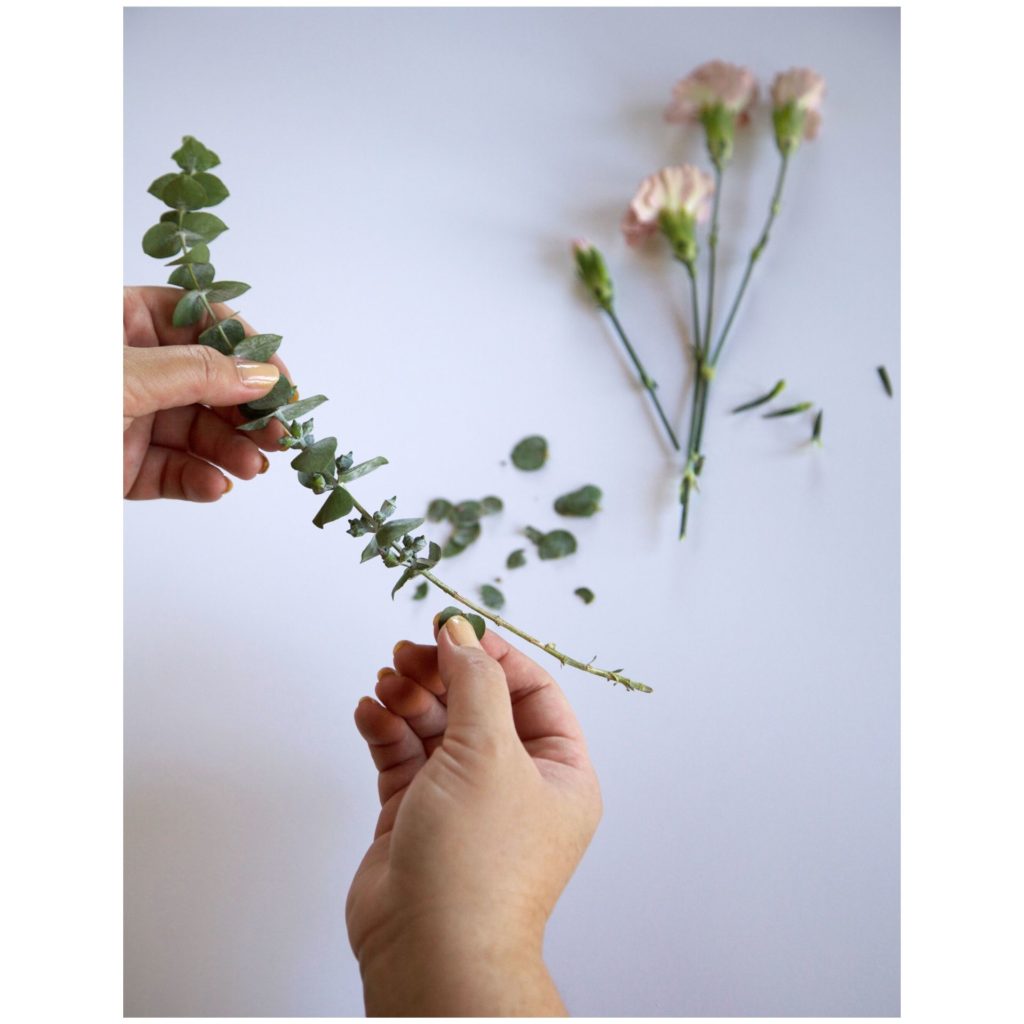
Caption: For your greenery, strip off all the leaves below the waterline, for your flowers remove all of the leaves from the entire stem.
Cut the bottom inch of the stems again, this time at a 45 degree angle which will help the flowers take in more water in the vases and help your arrangement to last longer and put them right back into water. Try to keep the stems as long as possible at this stage so you have the ability to decide how tall you want each stem to be for your arrangement later.
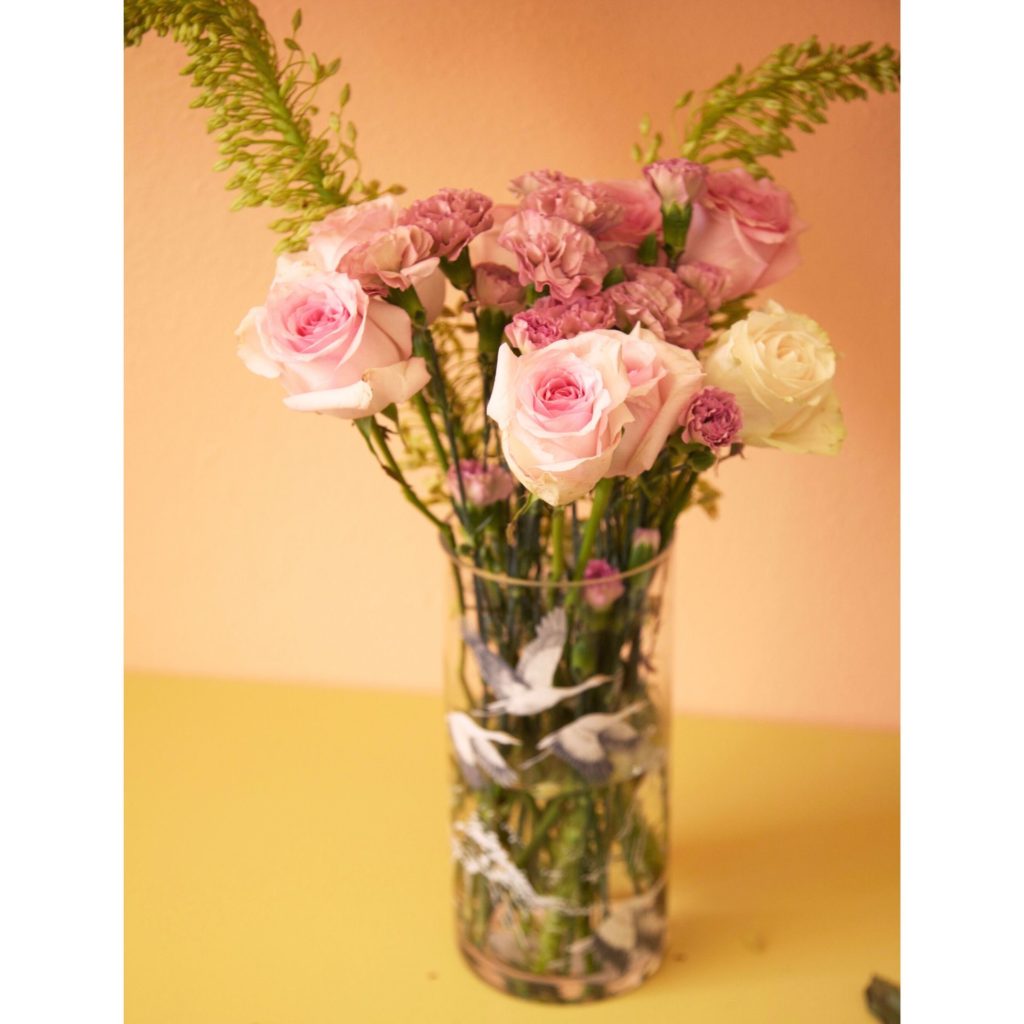
Step 2: Work from Big to Small
I like to start with the biggest or showiest flowers of the bunch when building my arrangement. This not only ensures that you can place them in the most prominent spots, they also serve to build the structural framework of the arrangement that gives you extra control when placing and filling in the rest of the flowers. For this arrangement, that means starting with the beautiful Foxtail Lily I scored.
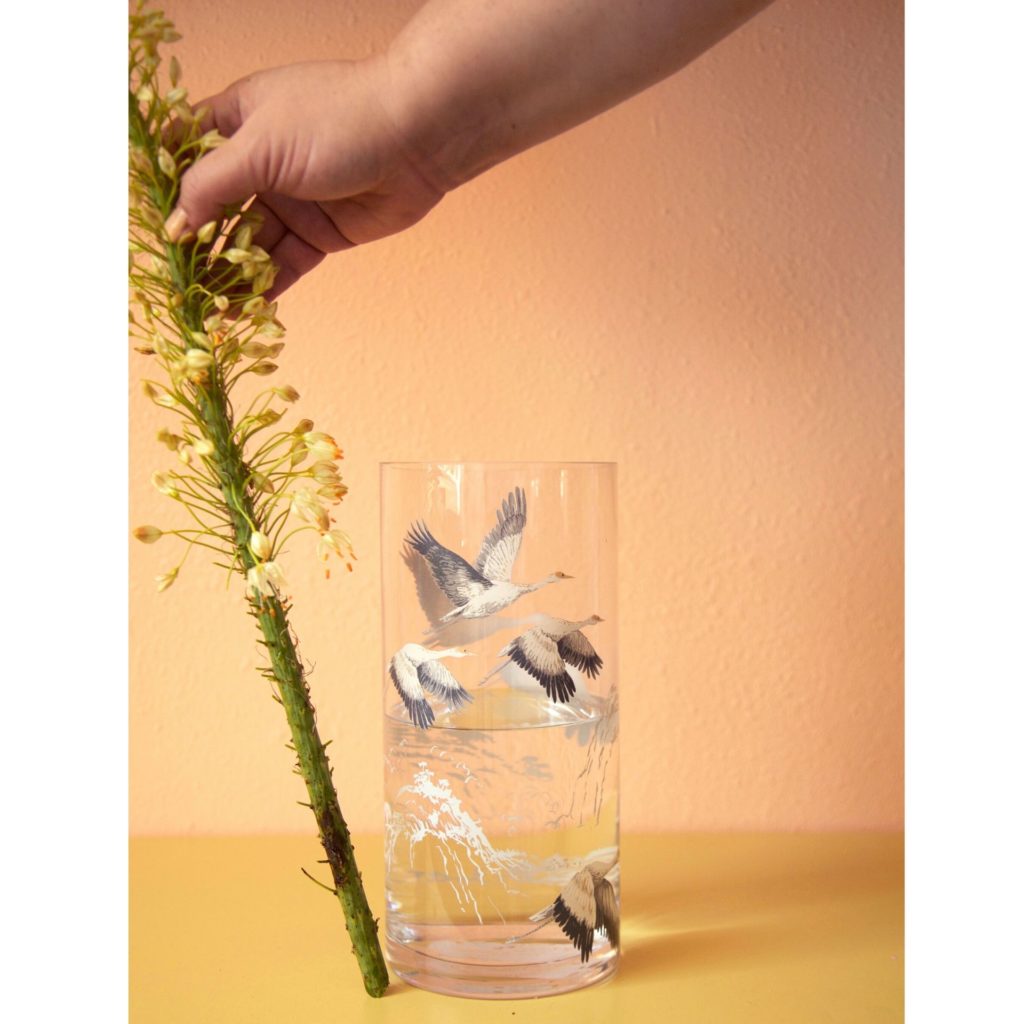
Step 3: Size then Cut
To determine the right height at which to cut, hold your stem up to your vase and eyeball it. Make your cut and place in the vase knowing this flower will be the tallest part of your arrangement. Play around with it trimming more as needed.
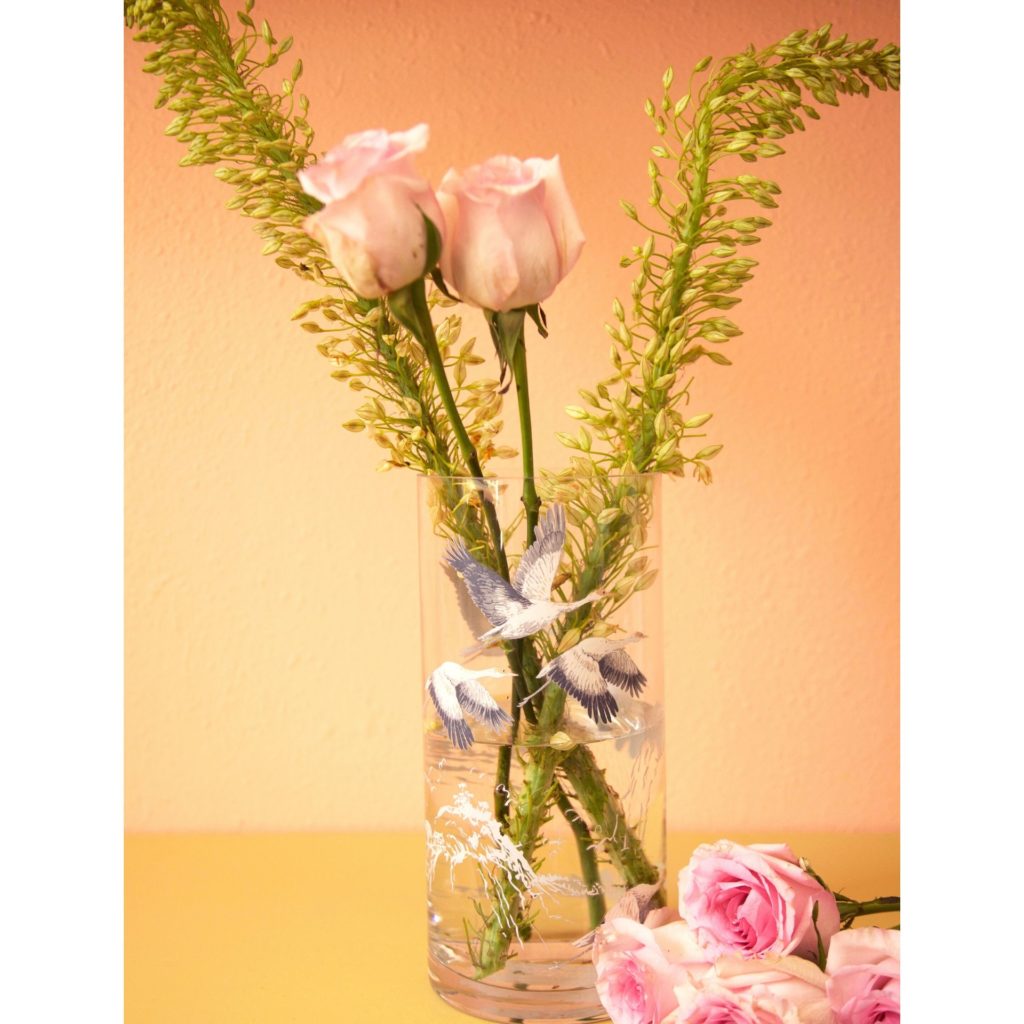
Step 4: Build Your Shape
My next showiest flower is my pink rose. Imagine the overall shape you are going for with your arrangement. In general, a rounded shape is easiest and most pleasing. Imagine a ball sitting atop your vase and use that to guide how short or tall you trim your stems in order to form that ball shape. I cut my pink roses short, tall then short so that the tallest group stands in the center to form the arc, and the two shorter groups go on either side to form the down curve of the ball.
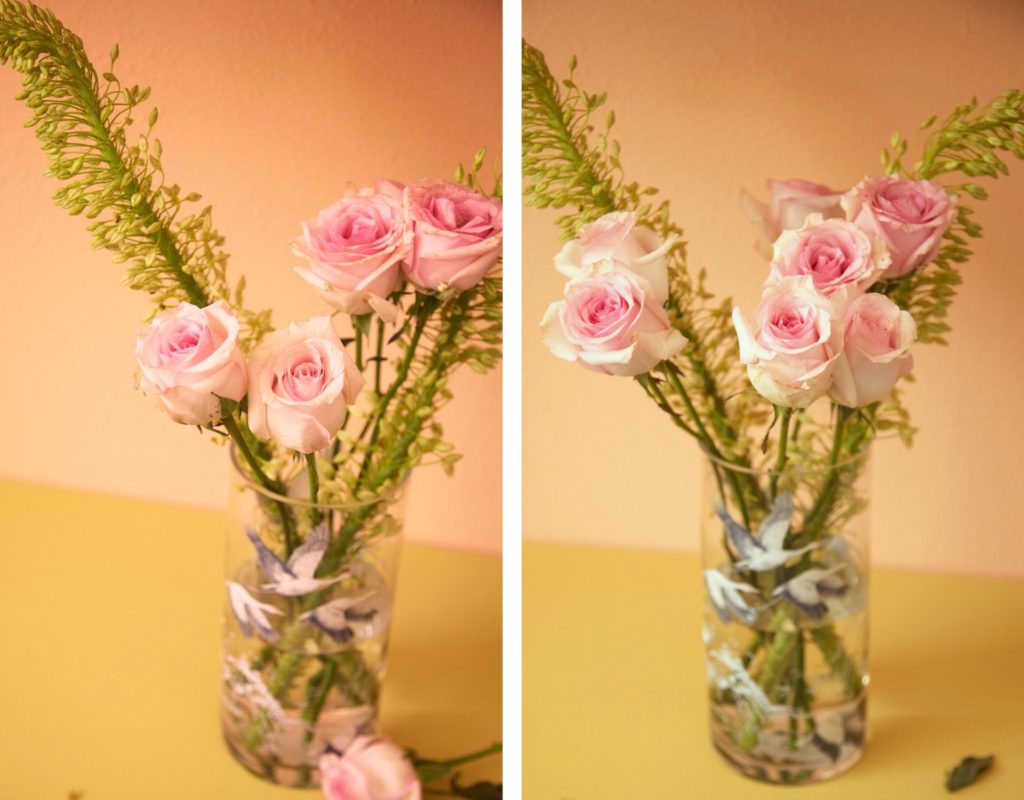
Here’s a trick that will save you time and ensure that your arrangement has some good composition: cluster 2-3 of the same flower at a time when you add them. This helps ensure those flowers (and colors ) are used evenly throughout the arrangement. Group them together holding them just under the blooms to create a nice and dense bundle. Keep working with them until you like the little cluster they form then snip all the ends off together so they stay the same height when you add them to your arrangement.
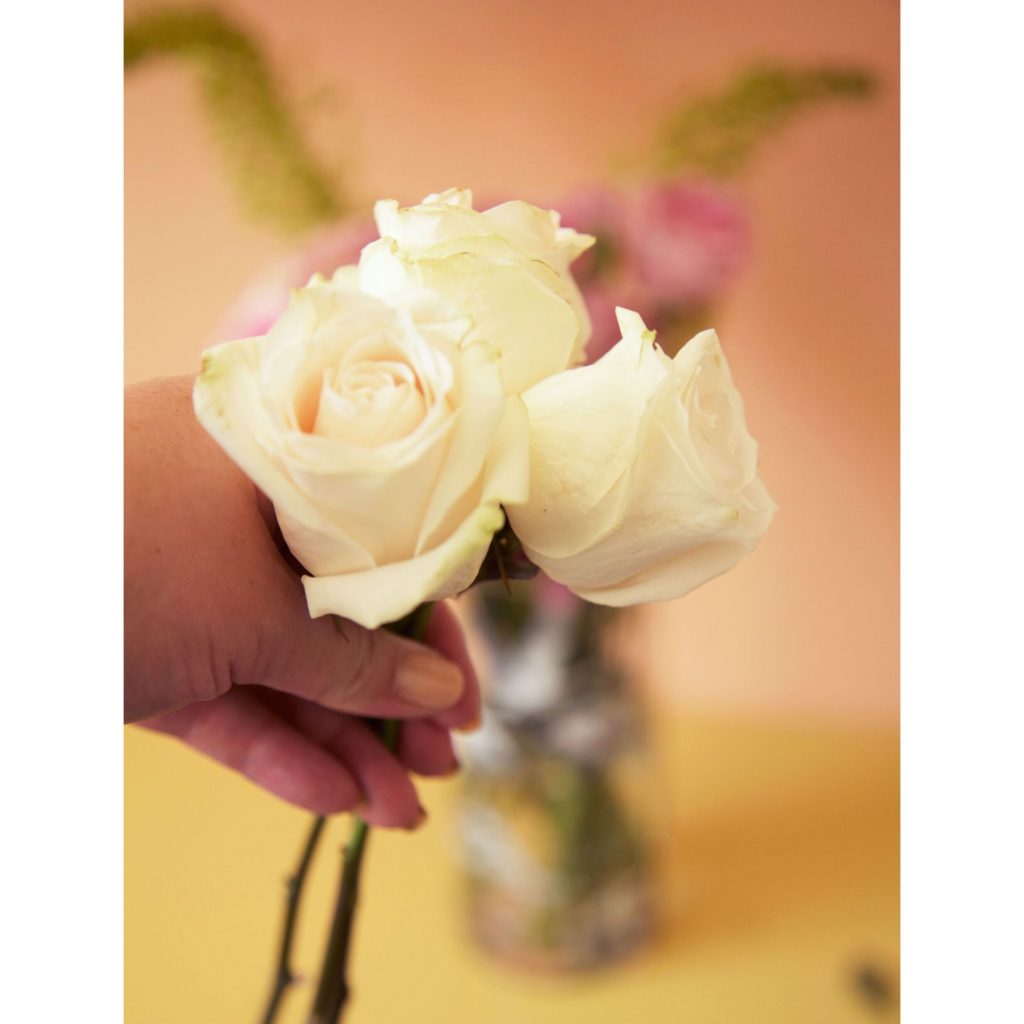
Step 5: Fill in the spaces with your smaller flowers
Now that you have your overall structure and shape coming together, you can fill in the gaps with your other flowers. For this arrangement that means the dusty pink carnations and the smaller white roses.
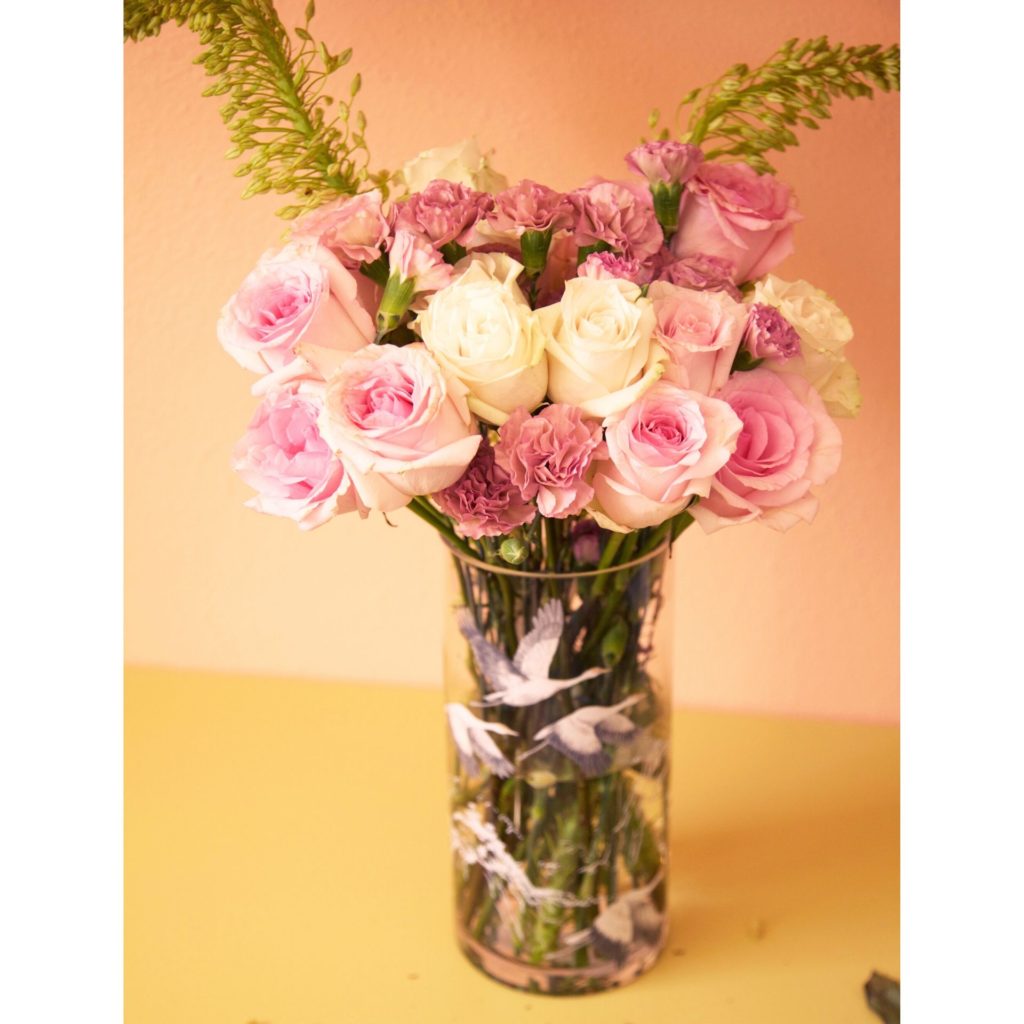
Save the tinier filler flowers—in this case baby’s breath for last. Use them to create a denser look overall and to fill in the void below your flowers and the top of the vase. Arrangements always look better when you can hide all those dark stems at the bottom and help make your arrangement look like it’s spilling beautifully over the edge.
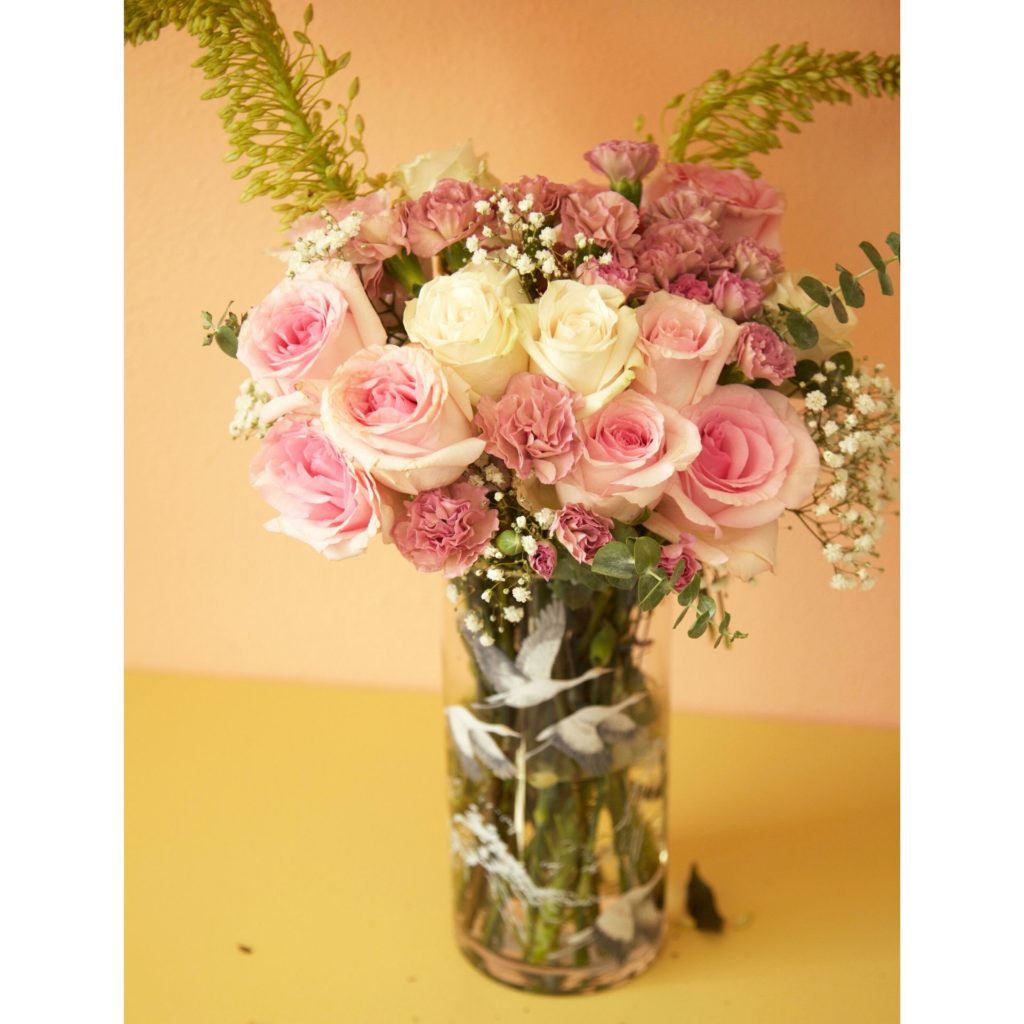
Caption: Baby’s breath looks best as an accent to an arrangement like this so be sure to really tuck them in low and tight under the main flowers.
Step 6: Add Your Greenery as Accents
I use the eucalyptus to continue to fill in empty spaces and to add a bit of contrast and dimension to the overall arrangement. Having them poke out a little here and there just ads a bit of whimsy and depth to the whole look.
Final Tips
Don’t be afraid to move things around as you go. Sometimes as the arrangement comes together you realize that some colors or blooms need to be spaced apart more while some start to get buried and you’ll want them to stand out a bit. If the shape isn’t quite right, carefully remove some stems and trim them until they stand at the right spot. Most of all, have fun with it! Enjoy the practice and you’ll just keep getting better and better.
For more flower arranging tips and ideas check out cottagesandbungalowsmag.com and follow me on instagram Jickie Torres (@jickietorres)